It is just lovely. I love it. Dropped the star a few times too. ^_^ Didn't crack. This clay rocks!
Friday, December 28, 2012
My Christmas Ornament for 2012
It is just lovely. I love it. Dropped the star a few times too. ^_^ Didn't crack. This clay rocks!
Labels:
2012,
baking soda,
Christmas,
clay,
cornstarch,
ornament,
paint,
sealant,
star
Sunday, July 22, 2012
Recycle : Notebook Wire - Bracelet
NOTEBOOK WIRE FUN
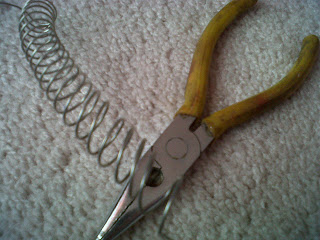
I am making a bracelet from notebook wire, and some old purple crafting string.
Measure and cut the wire.
Now for the old crafting string.
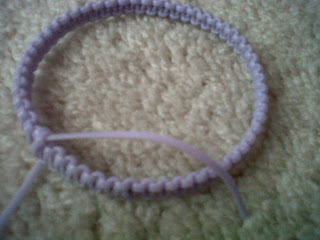
Cobra knots all around.
Lovely purple bracelet. Arm candy for going out.
Labels:
arm candy,
bracelet,
diy,
notebook wire,
recycle,
recycle notebook wire,
wire
Saturday, July 21, 2012
Recycle : Notebook Wire - Mini Tophat

NOTEBOOK WIRE FUN
So much wire. What do I do with it all? It is wonderful. I finished classes, and dumped old notes. I have so much wire now.
 This stuff must be galvanized or something, because it does not rust. Look at it. It will be perfect for bracelet or jewelry making, sculptures, or my project today. LOL. I made a mini top hat.
Not very hard. Directions courtesy of Threadbangers' lovely Corrine.
For my hat, I recycled some old t-shirt, and spam mail (you know those stock-paper advertisements). I used the notebook wire for the rim. Got one of my scrap ribbons and tied it on. I am gonna use this for one of my plushies, or maybe a future Alice in Wonderland costume.
Friday, July 20, 2012
Kumihimo Japanese Braiding
Quick History
Kumihimo is a name given to Japanese Braiding. This started as finger braiding, much like the knitting nancy. Then tools were developed to speed it along. This tools are stool or table like with holes in the center. They are called marudai and takadai. They can produce round, or flat braids quickly. Historically they were used by the Japanese samurai for functional purposes, much like para-cord to our army troops. They have also been used decoratively for jackets, and kimonos, and creating charms for special occasions.
Summary
Kumihimo is great. Simply it is rope or cord making. This is very ornate that the Japanese would make for special occasions, and for armor.
Links
http://www.weirdollsandcrafts.com/kumihimo/braiding-card.html
http://thegenieslamp.com/kumihimo/
http://www.kumihimo.nl/eng-begin.php
Lets get started
Beginners don't need much. You can checkout YouTube or Google to see all the wonderful stuff created from the cords you can make. You can start by buying a kit or just make your own beginner's kumihimo disc. I recommend making it.
You will need cardboard/foam, scissors, braiding materials, and creativity. You can use spools, and some kind of weight, like beads.
 First cut your nice sturdy cardboard or foam into a circle or square. Then cut slits around. You can either decide to start off with 8 or 16 slits. (I think 16 looks better for a beginner, but 8 is easier to learn.) Then poke a hole in the middle.
And to braid, you can use any type of thread. Yarn, embroidery thread, silk, recycle t-shirts, recycle plastic bags, or any thread like material you can knot and poke through the middle. For 4 strands, you will need to place one strand at 8, 2, 6, and 4 positions. Then you do the following:
2 to 5
6 to 2
5 to 6
8 to 5
4 to 8
5 to 4
repeat until you obtain desired length.
The cord will grow through the hole in the middle. It may help to put a weight in the middle, so you don't have to constantly pull it through. Spools also can help you keep the strand neat and free of knots.
There are many other braiding patterns. This is just one. You can look up other designs, or you can experiment on your own. I found a few places you can check out in the links.
Mine
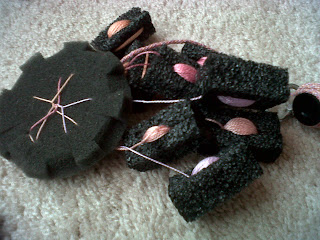
After many trials and errors, I have perfected this Kumihimo braiding tool. Cardboard was too squeaky, or too flimsy. Paper was weak. The best cheap free way is leftover packing foam. LOL.
I just cut a circle out, cut the slits, and poke the hole. It is perfect because it does not damage thread, even this embroidery thread. I don't have to worry about string breaking. I just wish I can put more weight on the strands. Check it out. I am trying to finish a whole skein to use for bracelet making. I think the colors are beautiful.
This is 16 slits, for 8 strand braiding. My pattern is just grabbing one strand over 2 strands. Then grab the next, and go over 2 strands again.
Thursday, July 19, 2012
Broken Scraps, Butterflies, and Arm Candy
I have been cleaning up lately. I threw away so many old notes. I have so much junk. I just went through a drawer with old jewelry. My god, old times. I haven't seen some of this stuff since middle school and high school.
Anyone remember these butterflies.
I have so many ribbons. LOL! I have more not shown.
 I have an old cheap charm bracelet. And a broken chain of rhinestones. Look! I re-purposed it. I think it looks very fashionable, and very cute on me. New arm candy for free. Yay.
Of course this drove me into googling arm candy. Lots of DIY. So beautiful, and then I remember para-cord bracelets. They are so nice. They remind of of macrame or tatting. Found some rope like string and did a cobra braid on a piece of ribbon. I think this makes a cute bracelet. I just need to finish the ends.
I think you may enjoy this. My sweet mother got me this. We went to this jewelry store that does DIY bracelets. I picked the string color, crystals, and design. The gentlemen tied everything together. It is beautiful.
Anyone remember these butterflies.
 I have an old cheap charm bracelet. And a broken chain of rhinestones. Look! I re-purposed it. I think it looks very fashionable, and very cute on me. New arm candy for free. Yay.
Of course this drove me into googling arm candy. Lots of DIY. So beautiful, and then I remember para-cord bracelets. They are so nice. They remind of of macrame or tatting. Found some rope like string and did a cobra braid on a piece of ribbon. I think this makes a cute bracelet. I just need to finish the ends.
I think you may enjoy this. My sweet mother got me this. We went to this jewelry store that does DIY bracelets. I picked the string color, crystals, and design. The gentlemen tied everything together. It is beautiful.
Labels:
arm candy,
bracelets,
broken scraps,
butterflies,
cleaning,
diy,
hair clips,
junk,
ribbons,
string
Subscribe to:
Comments (Atom)


